Today I will explain how to boot multiple puppies on an usb stick, using the frugalpup tool. For this we will need a virtual machine with usb pass through or boot puppy linux from a usb stick with a ram flag option “pfix=fsck,fsckp,copy” so that you can unmount your usb stick later on.
You can use a tool like rufus or balena etcher to flash the iso onto the usb.
These steps can be followed regardless of whether you are using a physical or virtual machine.
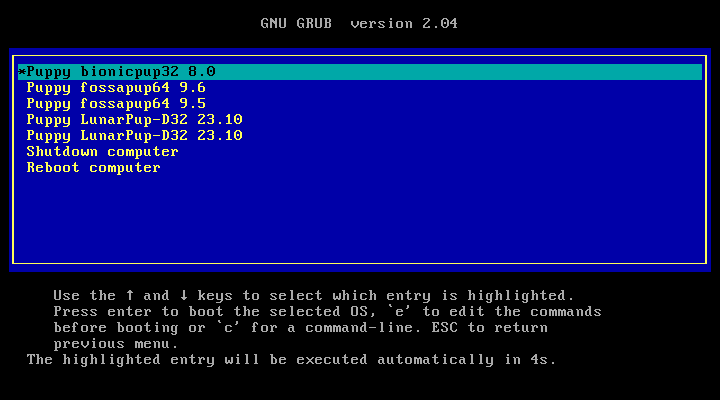
At the end you will get a screen similar to the picture bellow that will allow you to select the puppy you want to launch.
So let’s Start.
Setup
Make sure to have an empty usb stick, because all data will be wiped in order to continue.
Make sure to have at least one install of puppy booting since we will need it in order to run and copy the files to the partition where the puppies will be saved. For this tutorial I will be using Puppy F96. You can use whatever puppy linux you want as long as it has frugalpup.
Now let’s load the puppy linux. You should be able to use puppy just fine but some functionality will not work like making a save file/folder onto the usb you booted from because your booting from the iso rather than a writable install. To fix that you need to make the install a writable frugal install.
Note that some puppies don’t have the most recent version of frugalpup that is version 41. You can download it here if you don’t have the latest version
https://www.mediafire.com/folder/rdyc5lgzpeij1/frugalpup
Making Partitions
Open GParted by following the steps bellow.
Menu –> System –> GParted

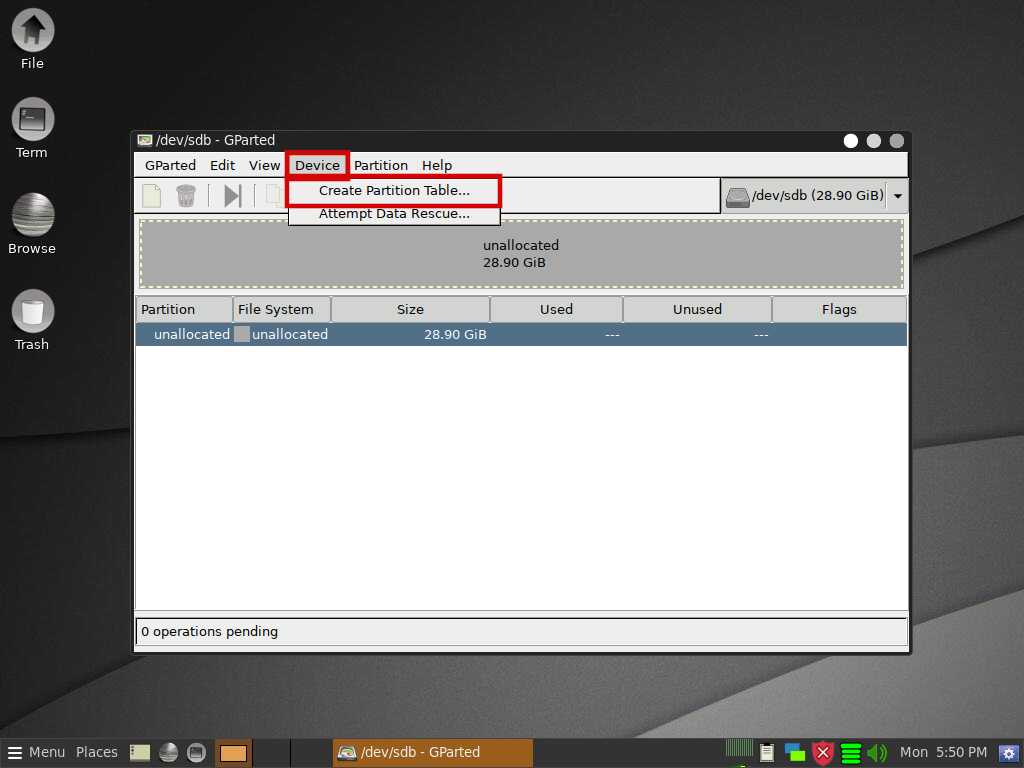
After GParted is open select your usb stick and then go to
Device –> Create Partition Table
Note In order to proceed be aware that all data will be lost, so make sure you don’t have any personal data that you want to keep. Also make sure you have the correct device selected
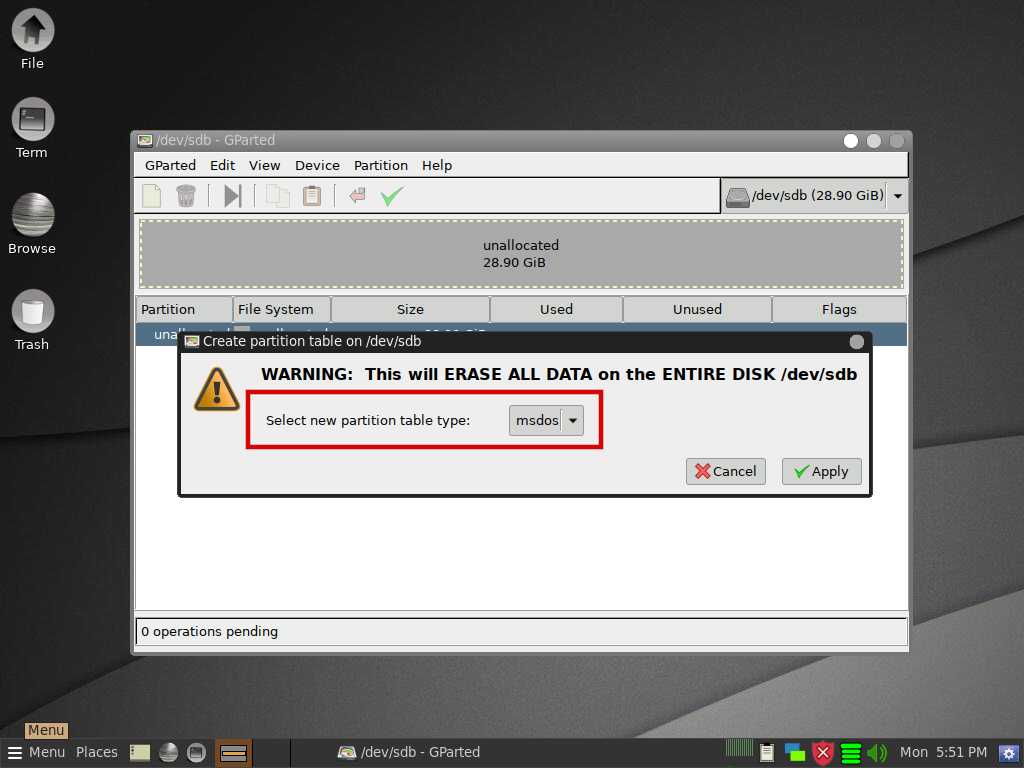
Select msdos as the partition table type and press apply. That will erase everything on the usb and make a blank msdos partition table without any partitions.
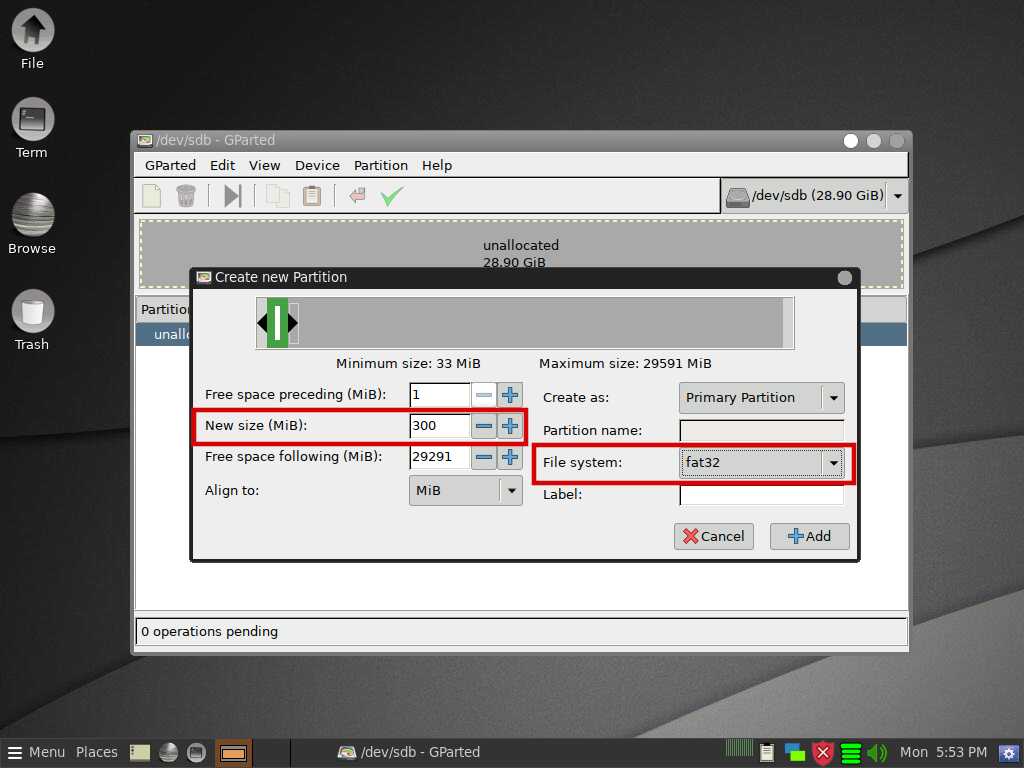
Now right click the unallocated partition and press new.
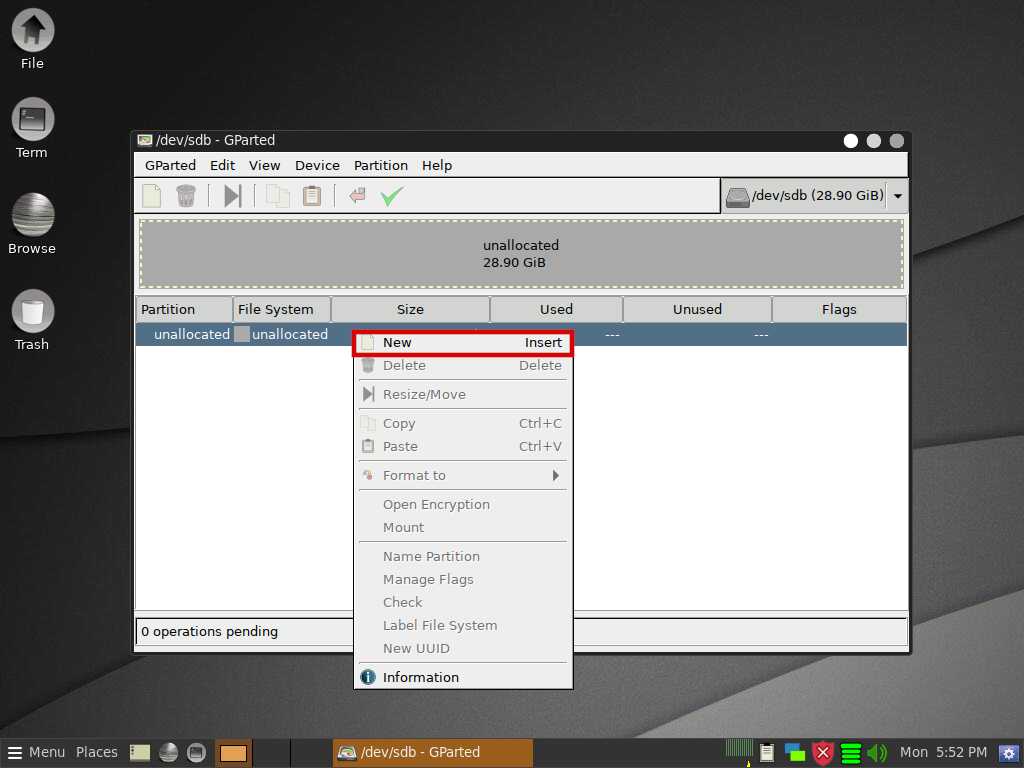
Make the size 300 MiB and the file system as fat32 and then press add.
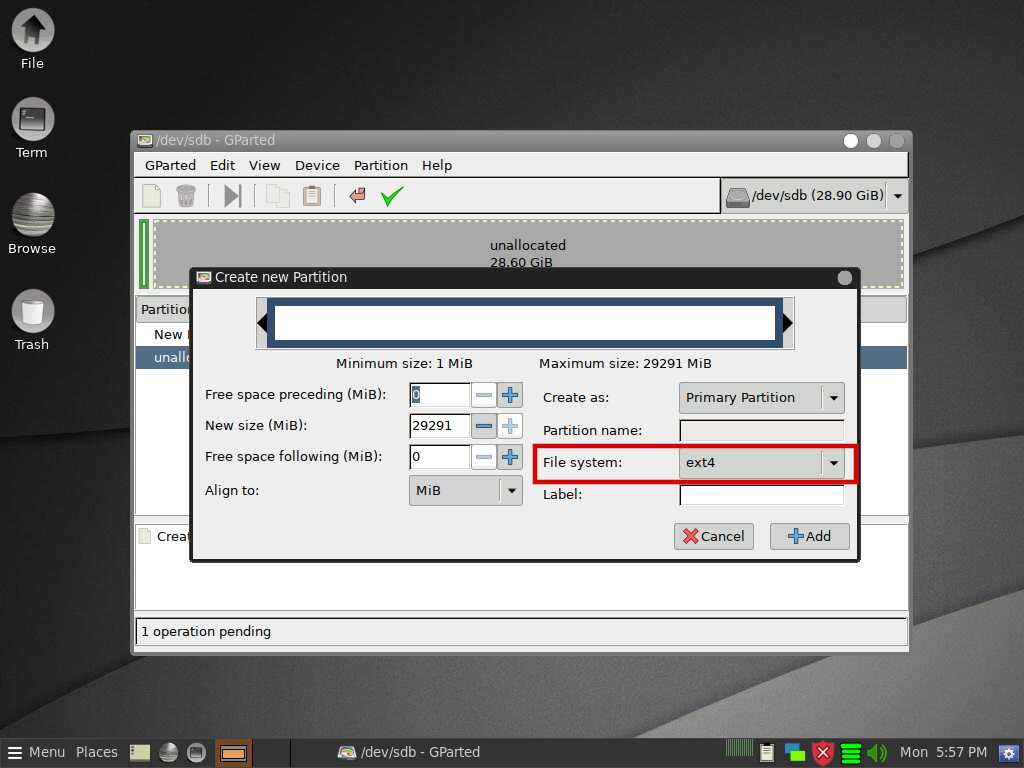
The rest of the space will be unallocated. Right click on that space and press new and then add.
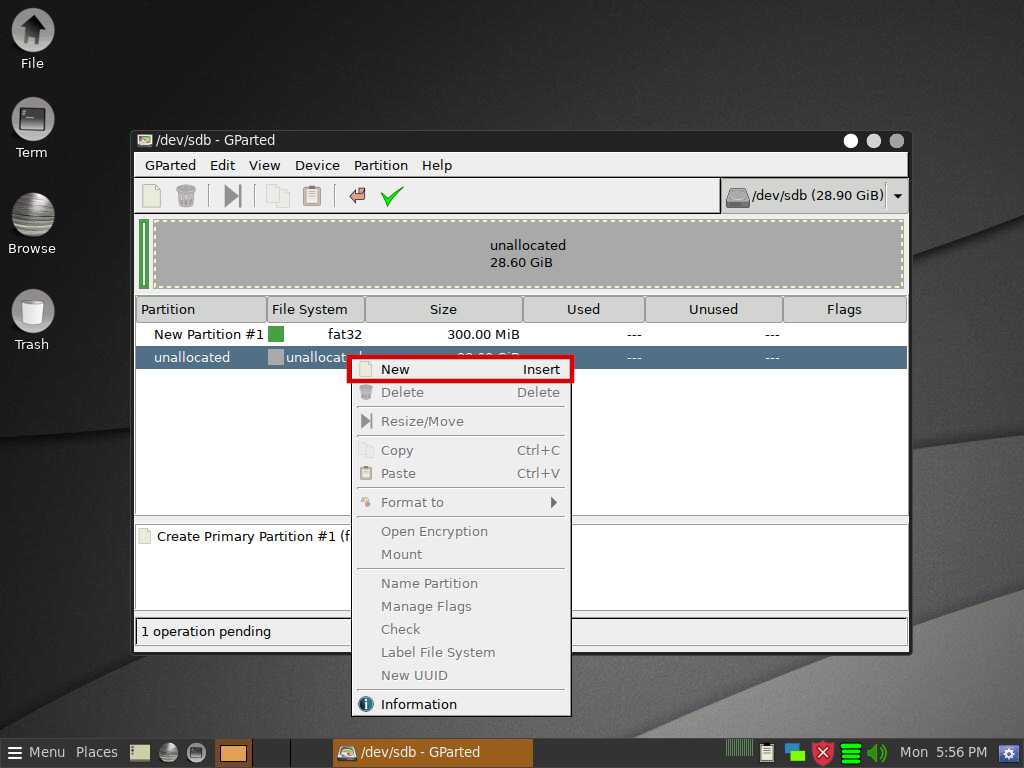
Use the rest of the space for an ext4 partition. Remember to press add.
Then press the green check mark on the top.

Press the apply button if everything is correct.

After that we want to set the boot flag on the fat32 partition. Right click on the partition and press manage flags.
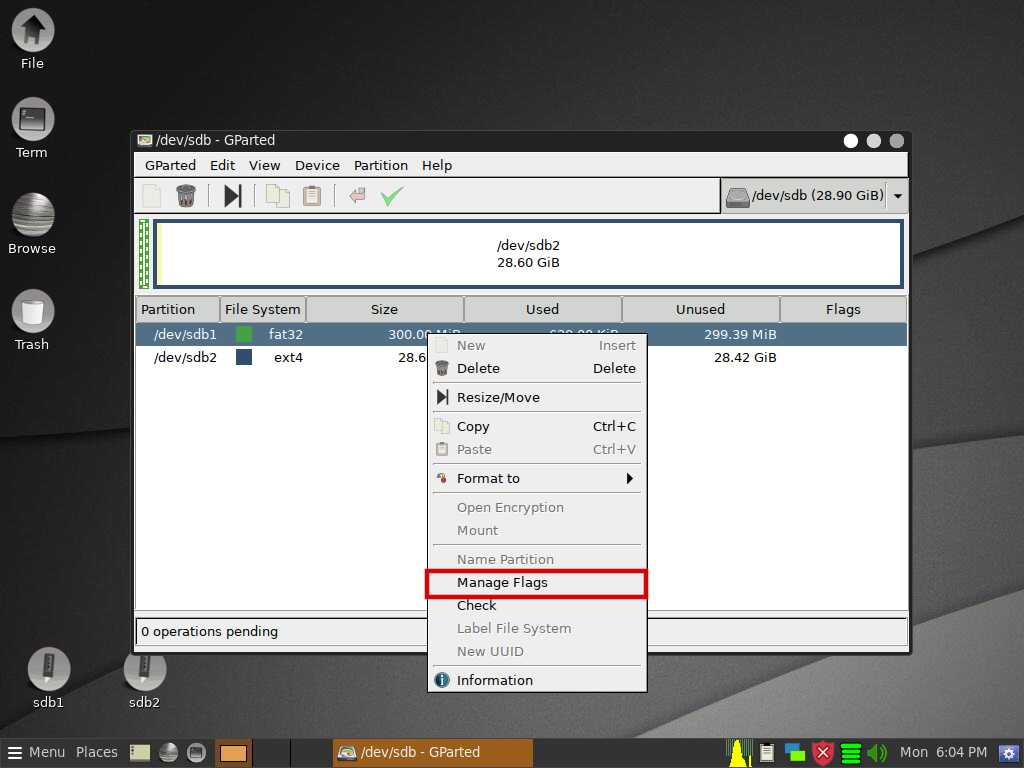
Then check the boot flag to on and press close.

When its done it should look similar to the screenshot bellow.

FrugalPup
After the partitions are made you can go onto getting the files onto the usb. Open frugalpup like shown bellow in the screenshot.
Menu –> Setup –> FrugalPup - flexible frugal installer

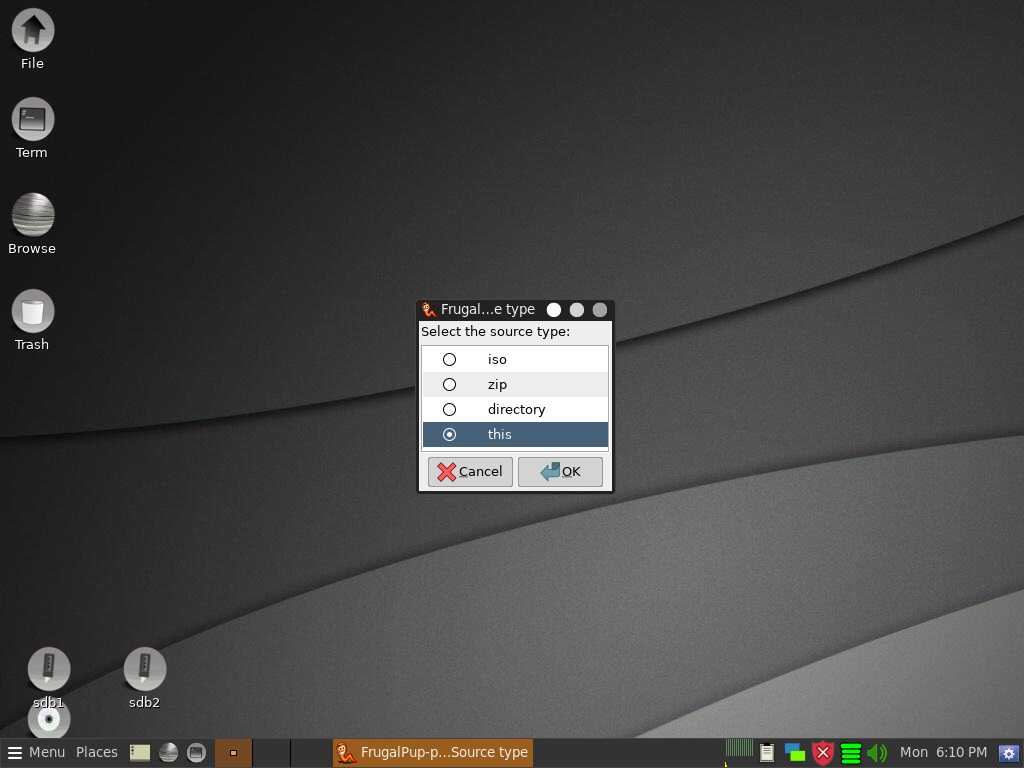
Now that frugalpup installer is open lets select the 3rd option that is called “puppy” like you see the picture below in order to start to copy our furgal puppies in to the right partition.

Now we are going to select a source where the puppy linux files are located and for that you will select “this” since we want to copy the currently running puppy at the moment but you can select “Iso” to select a different puppy.
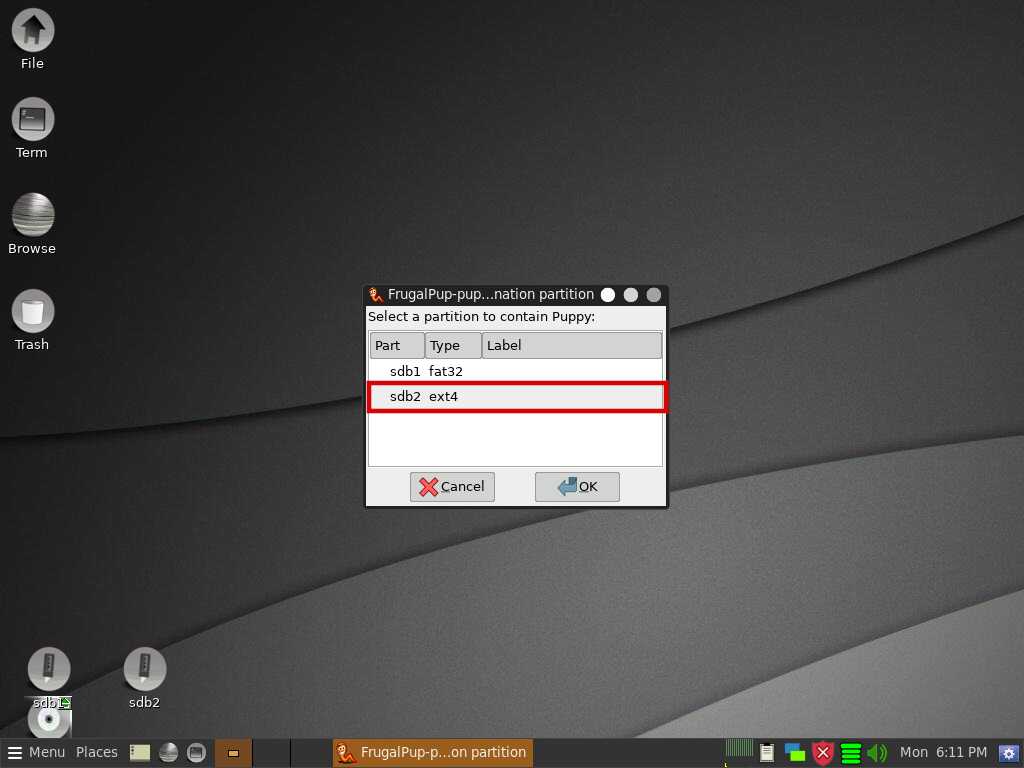
Now lets select the partition where we are going to copy files. For this tutorial will be sdb2 but in your case if you have more than one drive the name can be different. It will be the ext4 partition.
Then it will allow you to select where on the partition you want to install the puppy to. Make a new folder like shown bellow and select that folder then press ok.

Like the screenshot bellow it will ask to confirm if everything is correct like the path. Press ok if everything is correct.

After that it will start to copy the files to the drive. Just wait for it to finish.
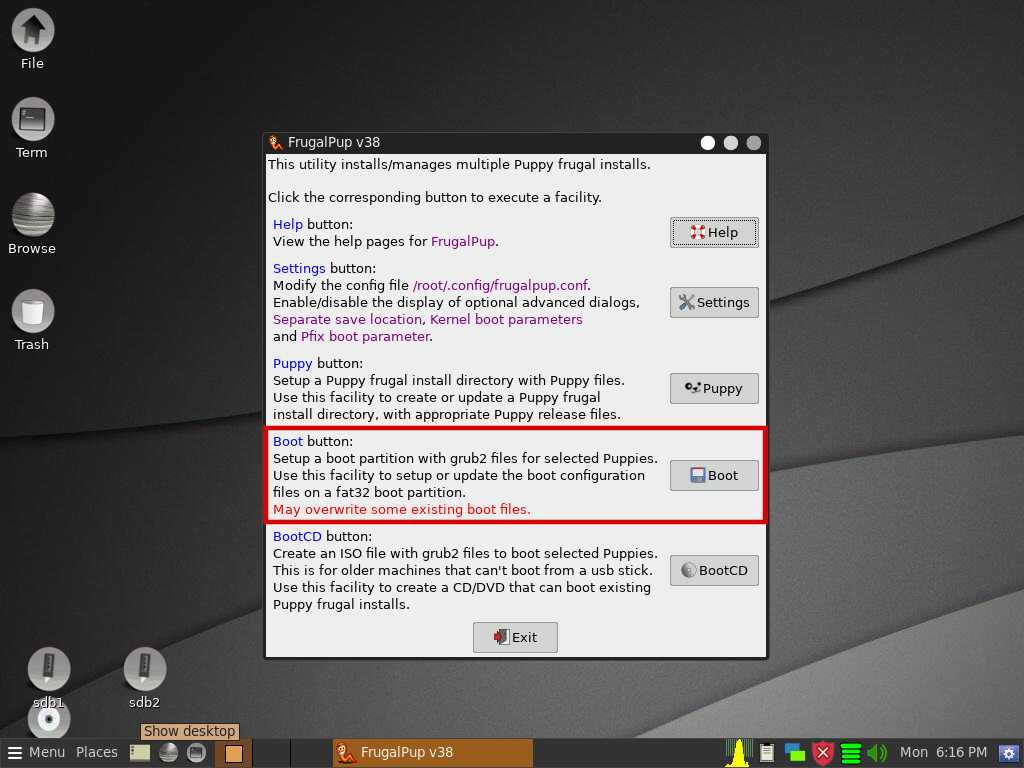
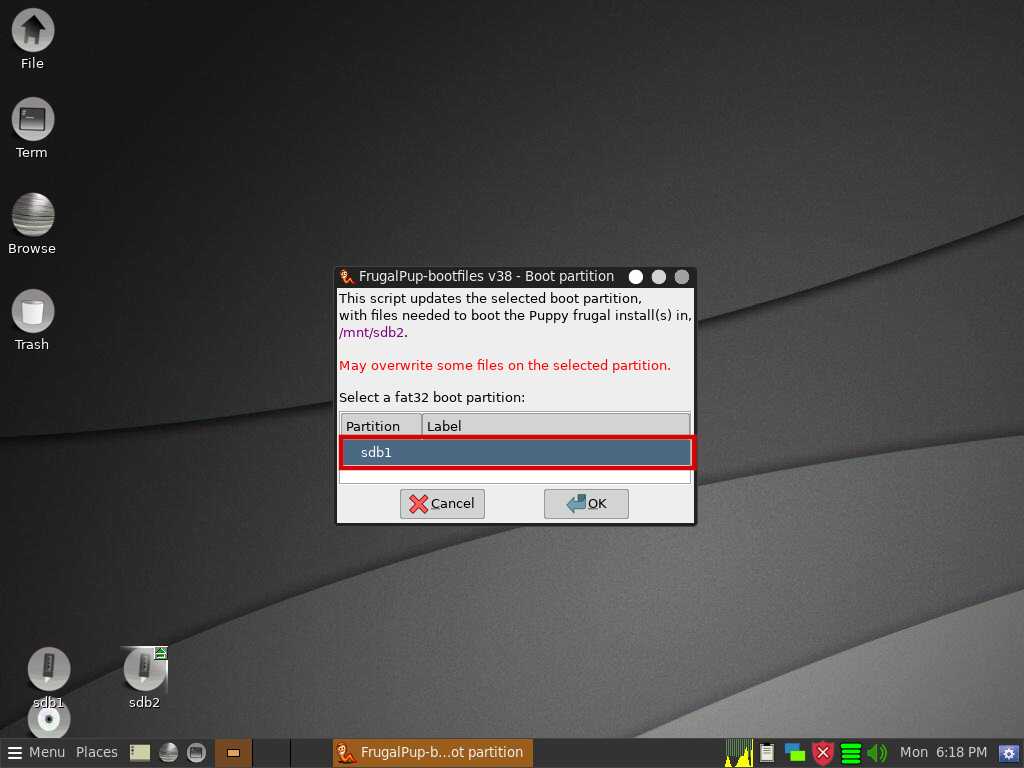
Then after its done it will take you back to the main frugalpup menu. Now we will select the option “Boot” like in the picture below to start to configure the boot partition.
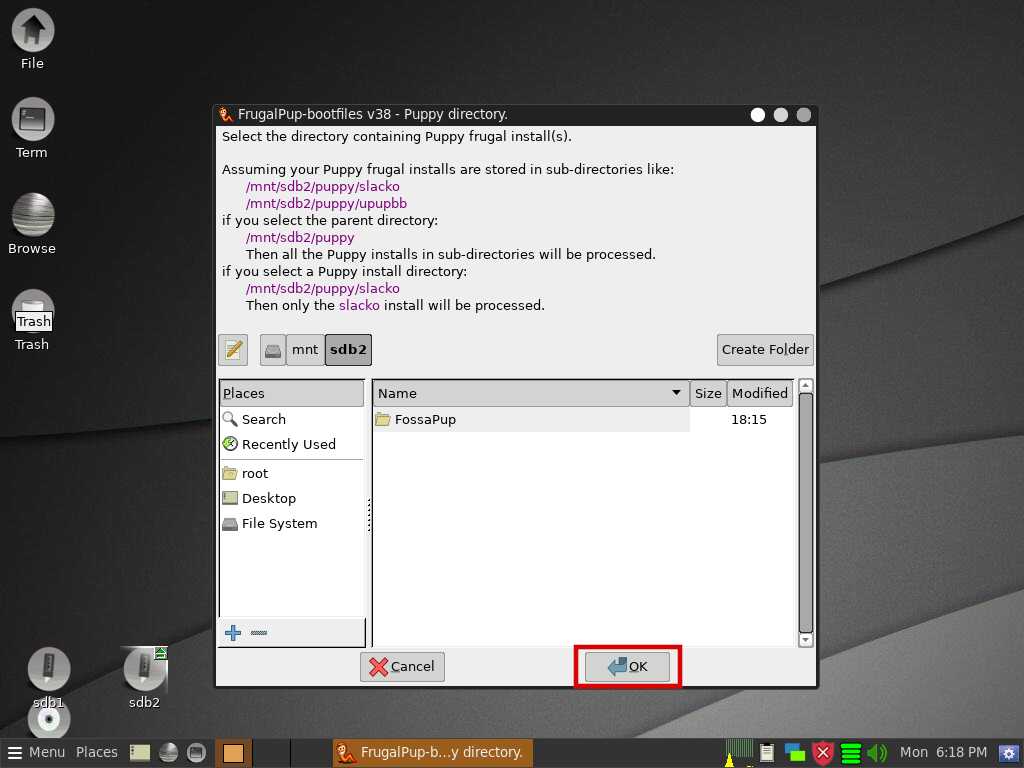
Now lets select the partition (for this tutorial it is the sda2 ext4 partition) where your puppies are so that when we configure the boot the frugal pup installer can know what partition the puppies are on and then press ok.

After pressing ok another window will popup asking you to confirm if it is the correct location where you puppy files are located and if so press ok.
Now I will select the partition where we can install/copy the boot files to the usb so it can boot. It should be the fat32 partition of your usb. Then press ok to continue.
It should then ask you what kind of grub you would like to install. Select the both option for both uefi and legacy bios computers.

And to finish we will see the last window where we gonna confirm if all is ok. If everything is correct then press ok.

It should then copy and install grub onto your drive. After its done press exit on the frugalpup installer and you should be good to go.
Finally we have setup your usb and you are ready to boot the usb.
adding another puppy
If you want to add another puppy to your usb you would opegn frugalpup and go through the steps and make a new folder on the ext4 partition to store the other puppy you want to add. Then after you update the boot files you will be able to select what puppy you want at the grub screen as the computer is booting.